Nothing goes on air without you approving it. Here we gathered everything about approving items, replacing a creative that does not fit, deleting, returning to the queue, and what happens when you do not come in to approve in time. At the end of the category there is also the explanation of what can be removed after publishing and what cannot.
We didn't find an answer for that search. Try another word, or ask the bot below.
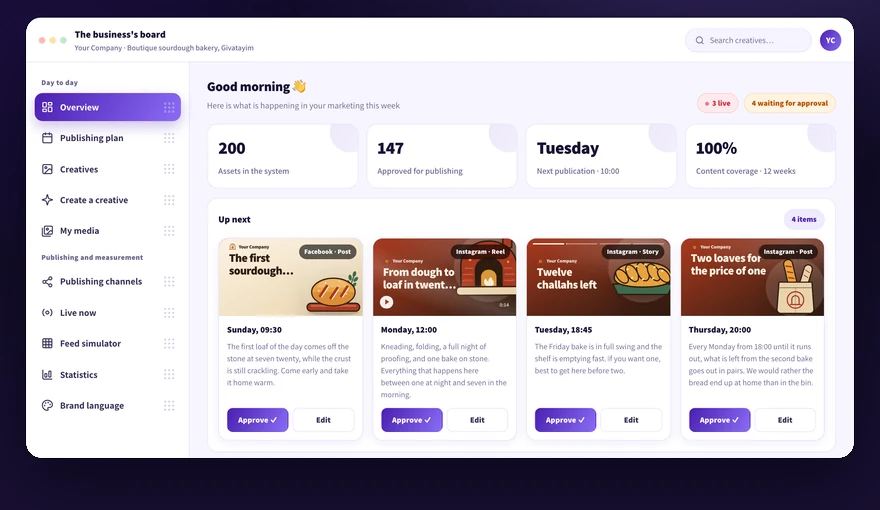
Every item that is created waits for your approval before going on air. You can approve straight from the Up next list on the Overview screen, or from the Creative bank.
1
Open the Overview screen and look at the Up next list.
2
Open each item and check the text and the visual.
3
Click the approve button on the item you want to release for publishing.
4
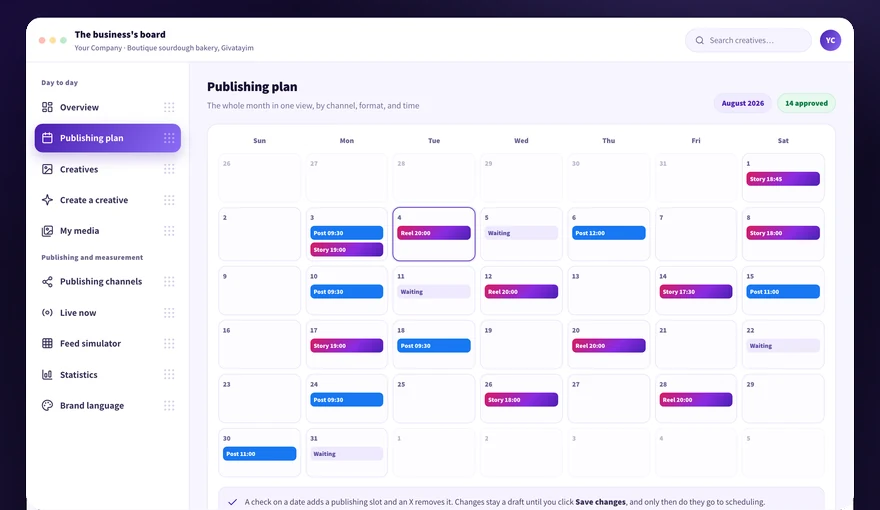
Open the Content plan and confirm which date and which format the item is slotted for.
5
Repeat the same process for every item still marked pending approval.
An unapproved item does not publish. There is no automatic publishing without your approval, and no switch that turns automatic publishing on. The approval order is also the publishing order.
An item that was not approved simply does not go on air, and it stays waiting on the calendar and in the Creative bank. You can approve it later or move it to a new date.
1
Open the Content plan and find the items marked pending approval.
2
Check for each item whether its content is still relevant for the set date.
3
Approve what is relevant straight from the item.
4
Remove publishing dates that are no longer relevant from the calendar, or add new ones. The full explanation is in the article How to add or remove a publishing date on the calendar in the Content plan category.
5
Approve more items from the bank, because the next dates fill from the approved queue.
6
Open the Overview to see the snapshot of the month.
A waiting item is not deleted and does not go out on its own. It stays in the queue until you approve or reschedule it.
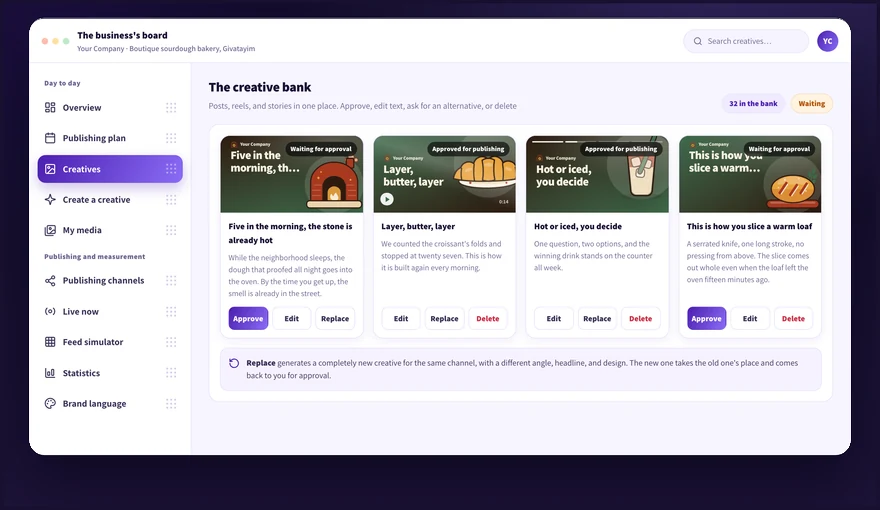
Every creative in the bank has a replace action, and you can also request an alternative or edit the text and image as long as the item has not gone on air. There is no need to delete and start from scratch.
1
Open the Creative bank and open the item you want to change.
2
Click replace to get a different version in the same spot in the plan.
3
Edit the text or replace the image if only one detail bothers you.
4
Request another alternative if it is still off.
5
Approve the version you chose to return it to the planned date.
Replace and edit work on the creative in the system only, and can be used even after approval as long as the item has not gone on air. What was already published on the network does not change following an edit here, and changing it requires a new creative.
Returning to the queue clears the publish stamp from the item and puts it back in the approved queue, so it will publish again at a later date. Use it when the content is good and worth running again.
1
Open the Live now screen and find the item.
2
Choose return to queue.
3
The item stays approved and is planted back in the queue, at a later position.
4
Check in the Content plan which date it comes back on.
When returning to the queue you cannot pick a date. The item goes back into the queue and goes out again by queue order.
Deleting removes the creative from the bank and from the date assigned to it. If you are only unsure about the timing, it is better to return it to the queue instead of deleting.
1
Open the Creative bank and find the item.
2
Check in the Content plan which date it is slotted for before deleting.
3
Click delete on the item itself.
4
Confirm that the next approved creative of the same type took its place on the freed date.
Deletion applies to the creative in the system only. A post already published on the network is not deleted from the channel by deleting here.
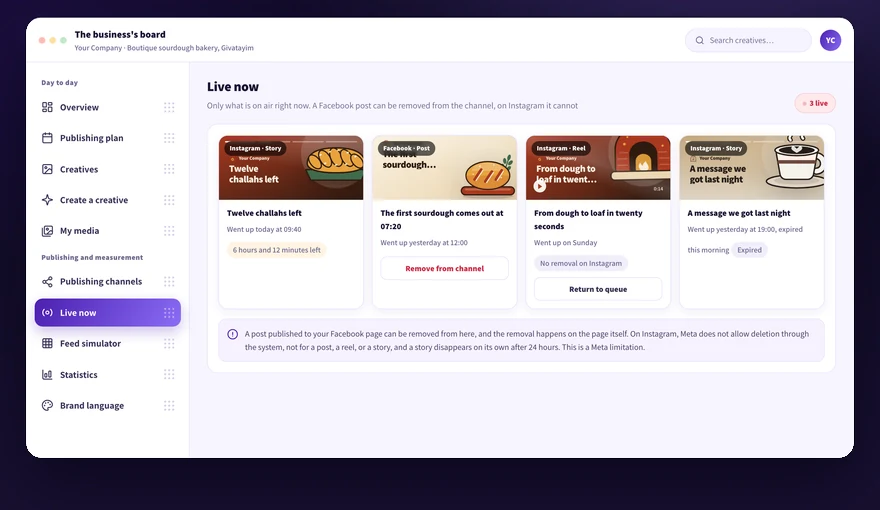
The Live now screen shows only what is on air right now, and from there you remove a post from the Facebook page. Instagram content, whether a post, a reel, or a story, is not deleted through the system and removal is done from the Instagram app. The full explanation is in the Live now category.
1
Open the Live now screen and find the item.
2
Check which channel it was published to and how much time it has left on air.
3
Click remove from channel on a Facebook post, and the removal happens on the page itself.
4
Open the Instagram app and remove a post or a reel from there, because there is no button for it in the system.
5
Wait for the countdown clock on a story, which ends after 24 hours and then the item is marked expired.
6
Open the Creative bank and delete or replace the creative so it does not return to the plan.
Deleting Instagram content is not available from inside Kampi yet, not a post, not a reel, and not a story. Personal data deletion is done by contacting us at info@kampi.co.il.
Didn't find it? Ask us
The bot knows the whole help center. If it doesn't know, it hands you over to us with a summary of what you already tried.