Here is how a new creative is made: first you choose the item type out of four, then the creation method out of three. There is also an explanation of requesting an alternative when the result is off, of editing the text and image before approval, and of what happens to a creative after you approve it.
We didn't find an answer for that search. Try another word, or ask the bot below.
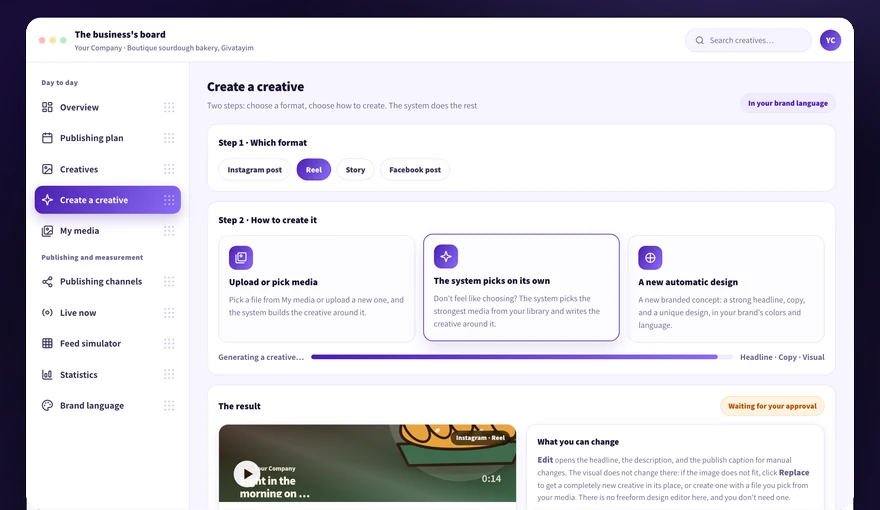
Creating a creative takes two steps. In the first step you choose the item type: Instagram post, reel, story, or Facebook post. In the second step you choose how to generate it, and there are three ways.
1
Open the Create creative screen from the menu.
2
Step 1: choose the item type out of four, Instagram post, reel, story, or Facebook post.
3
Step 2: choose a creation method, upload or pick media, let the system choose, or an automatic new design.
4
Wait for the result and check the text and the visual.
5
Click approve, and the creative is saved in the Creative bank.
A reel is built around a video file from the library. If there is no suitable video, upload a short clip from your phone via QR scan or pick another format.
The first way builds the creative around a file you choose, the second lets the system pick media from your library, and the third generates a new concept and design. In all three ways the text is written in Hebrew according to your Brand kit.
1
Choose upload or pick media when there is a specific photo or video you want to publish.
2
Choose let the system choose when you want it to match media from the library on its own.
3
Choose automatic new design when there is no suitable media and you want a concept and visual built from scratch.
4
Compare the results and request an alternative if the direction is off.
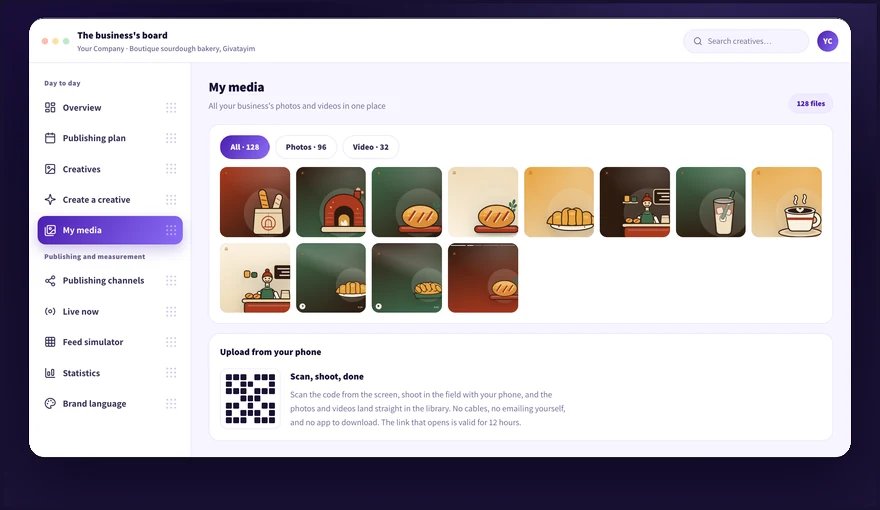
The first two ways work with what exists in the Media library, so it pays to upload photos and videos before you start.
For every creative you can request an alternative and get a different version. You can repeat the request until the result fits, and only then approve.
1
Open the creative you received on the creation screen.
2
Click request an alternative.
3
Compare the new version against the previous one.
4
Repeat the request if needed, or move to editing the text manually.
5
Approve when the result works for you.
The headline, the supporting text, and the caption can be edited manually before you approve. The change is saved on the creative itself.
1
Open the creative in the bank and click edit.
2
Fix the headline, the supporting text, and the caption, including a price or contact details.
3
Save, and the change sticks to the item.
4
Request an alternative instead of editing, if the problem is the whole direction and not the wording.
5
Approve the creative.
There is no free design editor where you drag elements on the creative. When the design itself does not speak to you, the right way is to request an alternative.
You can replace the visual of a creative without creating it from scratch. The replacement is made against your Media library.
1
Open the creative in the Creative bank.
2
Click replace on the visual.
3
Choose a photo or a video from the library.
4
Go to the Media library screen, upload the new file, and come back to the replacement.
5
Approve the creative after the replacement.
A story and a reel are two independent formats, and you choose them in the first step of creation. Both are built vertical, and a reel is built around video.
1
Open Create creative and choose story or reel at the item type step.
2
Choose a creation method. For a reel it is best to pick a video file from the library.
3
Check that the text is short and reads well on a full vertical screen.
4
Approve, and the item enters the queue by approval order.
A story published on Instagram disappears on its own after 24 hours and there is no way to delete it from the system. A reel requires a video file in the library; without one, pick another format.
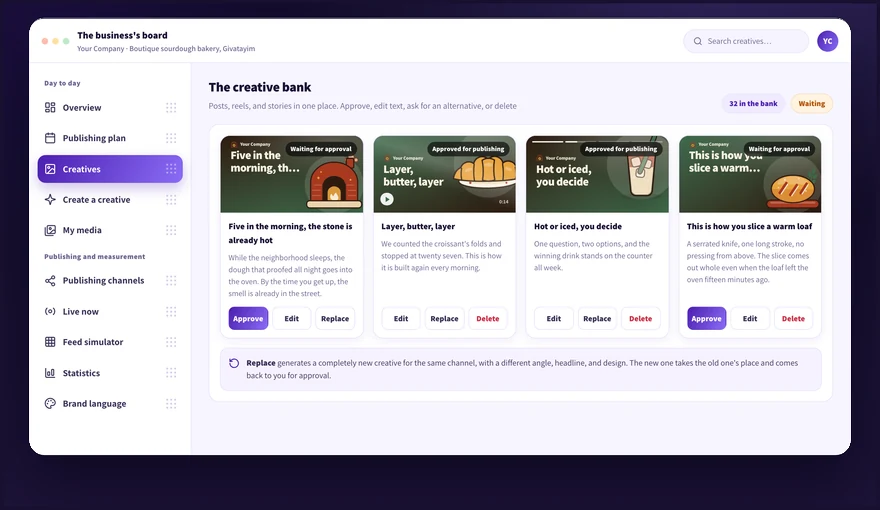
Every creative that is generated is saved in the Creative bank, even before you approve it. Approval puts it into the live queue, and the approval order is what sets when it goes out.
1
Open the Creative bank and find the item.
2
Approve it to put it into the live queue.
3
Check in the Content plan which date it is slotted on.
4
Delete it or replace it with another item if the decision changes.
5
Filter the bank between approved and waiting to see what is already in the queue.
On each publishing date the next approved creative of each format is picked. Whatever was approved first goes out first.
In the Smart studio you can create not just a single creative but a whole content campaign: fill in a short brief (topic, goal, audience), choose media from the library, and the system generates a coordinated series of creatives that joins the bank and the plan.
1
In the Smart studio choose the campaign track and fill in the brief: what the campaign is about, what you want to achieve, and who it speaks to.
2
At the topic step you can pick one of the suggested ideas or click other and write your own topic.
3
The Media library button opens a selection layer over the wizard: mark photos and videos from the library to accompany the campaign.
4
The system generates a series of creatives in different formats. All of them wait in the bank for your editing and approval, as usual.
A content campaign is organic content for publishing on the channels. A paid campaign is managed in the paid campaigns area.
Didn't find it? Ask us
The bot knows the whole help center. If it doesn't know, it hands you over to us with a summary of what you already tried.